November 19, 2010

Boston Cream Cupcakes

This recipe is one of my absolute favorites. I am not a huge fan of Boston Cream Pie because I feel that the cake-filling-chocolate ratio is off (I feel even more strongly about this in BCP donuts - ughhh). These cupcakes solve that by allowing the perfect proportion (in my mind, at least!) It is mostly cupcake - a yummy vanilla cupcake that is dense and not too sweet. Then there's vanilla pudding for the filling (and you can add as much or as little of this as you want, depending on your ratio preference - I stick with the recommended 1 tablespoon), and a semi-sweet chocolate glaze. This recipe originally came from a Women's Day magazine, but I made some modifications over the several times I've baked these so they end up "just right."

Without further ado...

Step 1: Filling
1 - 3 oz package of cook & serve vanilla pudding
1 1/4 cups milk
1/2 tsp vanilla

Prepare pudding as package directs, using 1 1/4 cups of milk. Scrape into a bowl; cover surface directly with plastic wrap and refrigerate until cold.

Step 2: Cupcakes:
2 1/2 cups all-purpose flour
3/4 tsp baking soda
1/2 tsp baking powder
1/2 tsp salt
3/4 cup unsalted butter, softened
1 1/4 cups sugar
3 large eggs
2 tsp vanilla
1 cup buttermilk

Preheat oven to 350 degrees.
In a bowl, whisk flour, baking soda, baking powder, and salt until blended.
Beat butter & sugar together in large bowl until light & fluffy. Add eggs, one at a time, until well blended. Beat in vanilla extract.
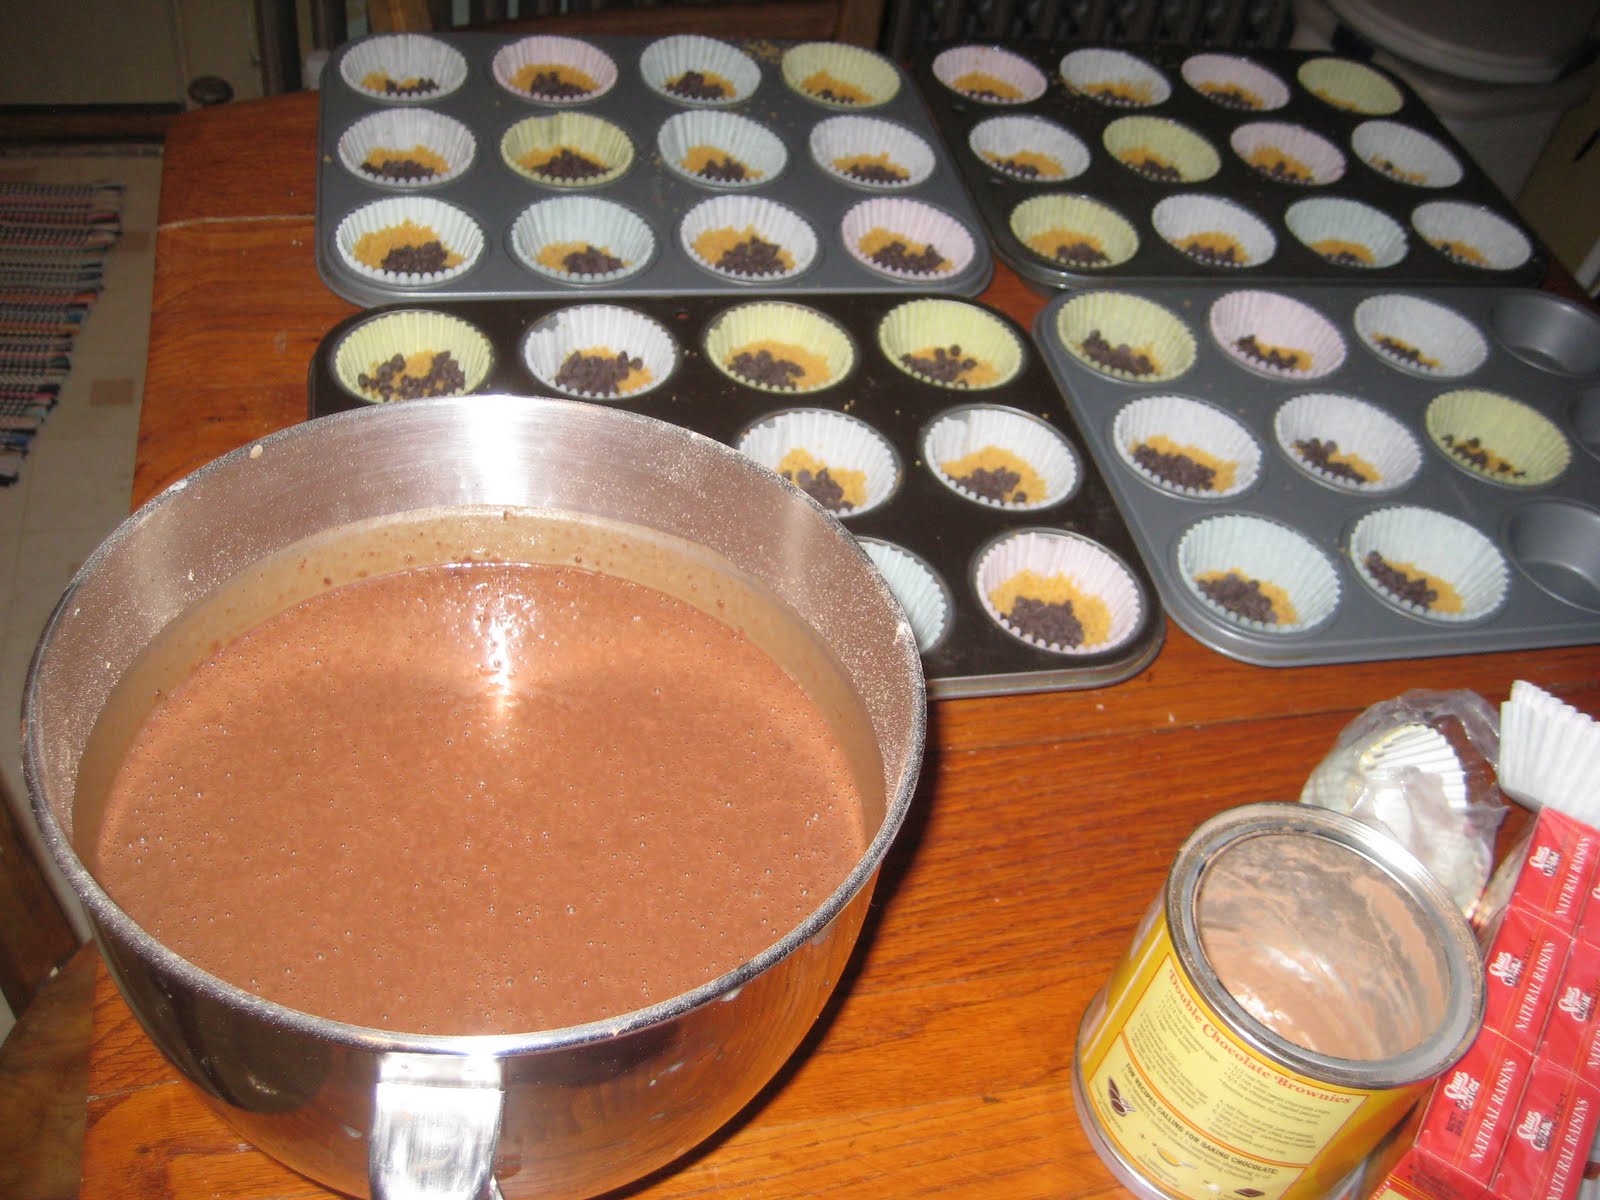
With mixer on low speed, alternately beat in flour mixture and buttermilk, beginning and ending with flour mixture, until just blended.
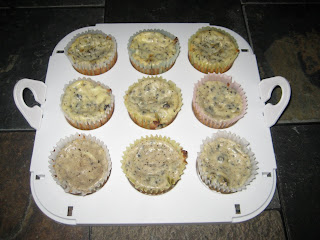
Spoon about 1/4 cup batter into each muffin cup. Bake 18 to 20 minutes, or until toothpick inserted into center comes out clean. Cool 5 minutes, remove from pan to wire rack to cool completely.

Step 3: Chocolate Glaze
8 oz semi sweet chocolate, chopped (about 1 1/2 cups chocolate chips)
1/3 cup sugar
1/3 cup water
3 tablespoons unsalted butter, softened

Place chocolate, sugar, and water in a small saucepan over low heat.
Cook, stirring, until melted and smooth - about 3 minutes.
Remove from heat; stir in butter until it melts and mixture is smooth. Let cool.
(I've found it very helpful to put it in the fridge for a while to thicken it up - at room temp, it will take a while to thicken up and it will just run off the side of the cupcake.)
Step 4: Assembly
Slice top off of cupcakes to come to top of paper liners.
Spread cut surface with about 1 tablespoon filling.
Top with cupcake top.
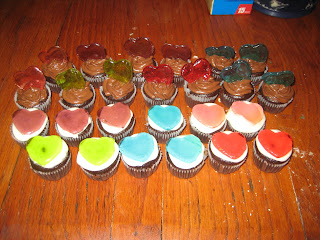
Spoon about 1 tablespoon glaze onto top center of each, easing it over top. (Do this slowly so it won't drip quickly off the sides!)

Enjoy!

November 15, 2010

Fall Cut-out Cookies


I can't believe how negligent I've been! I didn't realize I hadn't yet posted up about my fall cookies - and now winter is just right around the corner. In mid-September, I got very excited about slightly cooler temperatures and the upcoming promise of colorful leaves, pumpkin picking, and all-things-Halloween. I made almost 100 cut-out cookies to celebrate the season:

The recipe was pretty simple, but absolutely delicious: 

15 tablespoons unsalted butter, at room temp
1 cup & 2 tablespoons sugar
1 egg, beaten
1/2 teaspoon vanilla
a pinch of salt
3 1/2 cups flour, sifted, plus extra for dusting

Cream together the butter & sugar until light and creamy. Add the beaten egg, vanilla, and salt. Mix well.

Slowly add the flour and mix. Bring together into a dough, then flatten into a disk. Wrap in plastic wrap and refrigerate for 2 hours.

Roll the dough onto a lightly floured surface. Aim for a thickness of about 1/8 inch.

Using a cookie cutter, cut out the shapes you desire. The size of the cutter will determine how many cookies you can get from one batch. Gather scraps, reform into a ball, roll out again, and keep cutting!

Once all shapes have been established, refrigerate them for another 15 minutes. 

Preheat oven to 350 degrees.

Bake the cookies on the middle shelf for about 12 minutes or until firm. Let cool on the sheets for about 10 minutes before transferring to a wire rack to finish cool. (Let them cool ALL the way before you even think of frosting them!) These cookies will keep for 3 days in an airtight box, and for 24 hours once frosted.

Cookies cooling.
Now, for the frosting - a simple royal icing works just fine. The recipe for that:

2 egg whites
4 - 4 1/2 cups confectioner's sugar, sift

Beat the egg whites until foamy using a whisk. Gradually add the sugar and whisk until desired stiffness is reached.

(You can also use buttercream frosting, but it will be softer and won't set well for stacking)


Using coloring gels and an assortment of candies & sprinkles, decorate as desired!

Candy corn, Indian corn, & mellow cream pumpkins make for excellent additions!
   
What I thought was a pumpkin cookie cutter was actually an apple cookie cutter. To my dismay, I had to use massive amounts of red gel to get the apples "apple red" and then they tasted absolutely disgusting. Fortunately, the pumpkins turned out rather well!

 
The Mummy family. Their eyes are made out of red hots.
Enjoy!

November 11, 2010

Chocolate Almond Cake

Back in September, my amazing mother had a birthday. I can thank my mom for many things, including my sweet tooth, and I wanted to bake something in honor of her. I claim no expertise when it comes to baking cakes - I don't have the patience for it, really, and cakes aren't quite as forgiving as cupcakes - but I was eager to make a "proper" birthday cake. 


My mom enjoys almost everything chocolate, but particular enjoys chocolate almond ice cream. Not being able to transport an ice cream cake for her birthday, I attempted to make a chocolate almond cake. Using the double chocolate cake recipe that I posted around the 4th of July (Double Chocolate Cupcakes & Homemade Vanilla Buttercream), and adding a simple twist on the buttercream frosting (instead of vanilla, I added almond extract), I created this cake:


The icing itself was white, so I tinted it using coloring gel. I always feel like brown gives the illusion of more chocolate (the only problem with coloring gels is that they change color in about 24 hours, so the frosting eventually looked more peanut-buttery than chocolaty.) I then topped it with almond slivers, chocolate shavings, and chocolate-covered rum balls that my husband has nicknamed "cannonballs". (Okay, to be honest, I was trying to use up some of the extra toppings I had laying around, and fortunately my mother is VERY forgiving about the appearance of cake!) But despite its odd decorating theme, it was delicious and the good balance of chocolate & almond that I was going for. :-)


November 7, 2010

Easy Mini Oreo Cheesecakes


It's been a while since I've posted - almost two months! During that time, I've been working a lot of hours in my "real" job, while baking on the side. Now that the crazy schedule at work has slowed down, the next few weeks will be catch-up of pictures & recipes. I've decided to start with this super simple mini Oreo Cheesecake!


Ingredients:
*2 - 8oz packages of cream cheese, softened
*1/2 cup sugar
*2 eggs
*12 whole Oreo cookies & some additional crushed cookies
*3 oz. semi-sweet baking chocolate (optional)
*1 cup thawed whipped topping (optional)

Preheat oven to 350 degrees.

Beat cream cheese and sugar in large bowl with mixer until well blended.

Add eggs, 1 at a time, beating on low speed after each just until blended. 

Fold crushed cookies into batter (optional).

Place 1 cookie in bottom of each of 12 paper-lined muffin cups. Fill with batter. 

Bake 20 minutes or until centers are almost set. Let stand to cool.

Refrigerate 3 hours. 

Optional: Drizzle melted chocolate and top with whipped topping. (I opted not to do this step because I am not a fan of whipped topping; however, you could really add any kind of topping that you wanted to this - strawberries, chocolate, white chocolate, etc. I'm a minimalist when it comes to Oreo Cheesecake and just wanted to keep it simple).


Enjoy!

September 17, 2010

Why I Love Baking

I hate cooking. Or, at least, I did until I married a man who loves to come with all sorts of creative meals. Now I find I spend more time in the kitchen helping chop vegetables and other such healthy things than I ever thought I would. That said, despite my previous aversion to cooking, I've always been drawn to baking. I used to make giant cookies in my mother's oven as a child, because really, who doesn't love cookie cake? Back then, the motivation was because I wanted to then eat said cookie. I baked solely to get the end result. 

My baking interest took a plunge for a while through college, when I lived in a dorm and had no proper baking gear. (My interest in eating baked goods did not plummet, however). It took a few years for the desire to create desserts to rekindle, but it actually happened while I was planning my wedding and thought to myself, "Hey, cupcakes are cute." 

Since then, I've turned it into a full-time hobby. Here's why:

1) I do like to eat sweets, but I'm more interested in the process behind making them. And the batter. I love batter. In 5th grade, I took a "dessert" of cookies with a brownie batter "dip" to the school Halloween party. No one ate it, because it was just raw brownie batter. I enjoyed it the entire way home. I have a serious weakness for raw batter and dough.

2) Dessert makes people happy. Almost everyone loves dessert. Everyone loves it even more when someone else makes the dessert. Baking is a small way to spread the joy.

3) Along those lines, I have been told there are some "people" who don't like dessert. To them, I say... nothing. I've never met such a person, and whoever says that they have is lying. Everyone has a weakness for a particular dessert, you just have to figure out what it is.

4) I do realize that desserts can be *gasp* fattening. Yes, this is true. I also realize that refined sugar and flour are bad for you. And I know a lot of people are on diets. I think it is great that the general public is working to get healthier. I also strongly believe that diets don't work without some emotional gratification. If we deprive ourselves of things we enjoy, then we look at food solely as sustenance. I think it is this view that can become very dangerous. Not only does this view lead to eating disorders, it also takes away any enjoyment from food and the processes by which we prepare it. And if we learned anything from Patch Adams, it's that being happy helps make you healthy! (No, I do not mean that eating a whole batch of cupcakes in one sitting will make you happy as your significant other treats you like dirt. That's an extreme. I'm not talking extremes.)

5) I strongly believe that we should aim to eat real food (e.g. not processed food-like substances) as much as possible. When I get a dessert from a restaurant, I have no idea when it was prepared or what went into it. Even worse, if I buy "cosmic brownies" at the gas station, I'm putting an incredible amount of food-like substances into my body without actually giving it any food. I like to know what goes into what I eat. That's why I make everything from scratch, and buy my ingredients fresh. I never buy boxed caked mixes or frosting. My milk, eggs, and butter all come from the local dairy down the street. I can see the cows that provide me with these ingredients grazing in the field as I drive to work each day. I can't get locally-grown sugar, but I do experiment with raw sugar as much as possible, so it's gone through fewer steps for refinement. When I eat a cupcake that I make from scratch, I can name (and pronounce!) every ingredient that went into it.

6) It relieves stress. True, sometimes it creates it, but for the most part I find it incredibly relaxing. I can put on music, dance around the kitchen, and enjoy some time to myself. Or I can hook up the hands-free on my phone and catch up with friends and family. Or I can manually go through the baking steps while mentally talking things over with God. I can be completely quiet or I can be loud and crazy. When I feel like my life is falling apart, nothing makes me feel better than making a huge mess in the kitchen, and then ending not only with a clean kitchen but also yummy desserts to show for it. Even if I can't control the mess in my own life, I can control the mess in my kitchen.

7) Baking gives me permission to make mistakes. I am the type of person who works very hard not to mess up, but I am bad at it. That's where baking comes in. While I might not get a perfect end result every time, I learn something new each time. And usually the mistake is something with the decorations, not the ingredients. This means I might end up with a less-than-perfect looking cupcake, but it still tastes great. It's an awesome reminder not to judge something by the outside. And also, too, that we need to make mistakes in order to grow. It's like Life Lessons from Betty Crocker.

8) Lastly, I love to create. That said, I'm not visually artistic. I've never been able to draw or paint. I'm not musically talented. I can't dance (I try, but I can't). I'm not handy (ask my husband). I even have a hard time growing flowers.The only type of "art" I've ever been able to create is poetry, and even that was never very good. True, my degree is in creative writing, but the thing I love about poetry is the way it takes language - or, rather, individual words - and pieces them together into something much bigger (either in length or meaning). When I started baking again, it gave me an outlet in which to create in a very similar manner. Taking individual ingredients, I am able to put them together and come up with something amazing. Something that everyone can enjoy. It's a wonderful feeling to create something beautiful, delicious, and ... gone the moment it gets put out on the table. :-)

September 11, 2010

Scotcharoos

As much as I love cupcakes, I believe Scotcharoos might be my all-time favorite dessert. You might be asking yourself, what is a Scotcharoo? I like to call them Rice Krispie Treats on crack, although I've found that sometimes the "crack" thing scares people away. So in reality, just think about them like this: take all the best ingredients in the world (chocolate, peanut butter, butterscotch, and sugar) and put it together into a handy treat. That's a Scotcharoo.They're delicious, you can eat a bunch of them without getting sick (a must in my book, since I have no self-control), and they're incredibly easy to make. So easy to make, in fact, that I thought I'd share the recipe with this follow-along picture tutorial. Just for fun.

STEP 1:

 
Mix together 1 cup white sugar and 1 cup light karo syrup in a sauce pan. Over medium-low heat, stir until sugar is dissolved. I like to pretend this means that the sugar is actually disappearing, so this treat is healthy, but in reality you're just blending it with unhealthy corn syrup. Dieters, beware. People with taste buds, rejoice.

STEP 2:
 
Put 6 cups of Rice Krispies in a large bowl. There will be no snap, crackle, pop tonight.

STEP 3:

 
Once sugar is dissolved in karo syrup mixture, remove from heat and add 1 cup smooth peanut butter. Mix until smooth.  You will now have an amazingly sticky and delicious combination.

STEP 4:
 
Add hot mixture to cereal. Mix together thoroughly. This most likely means using your hands, which you should be sure to butter up really well beforehand (after you wash them, of course). Be sure to make lots of strange faces while mixing. I find husbands do very well at this job. If utilizing a husband, be sure to have a fire extinguisher handy. You just never know.

STEP 5:
 
Scrunch (that's a technical term) the mixture into a 9"x13" inch pan. Or whatever kind of pan you desire. There are really very few rules here.

STEP 6:
 
Melt together equal parts of semi-sweet chocolate chips and butterscotch chips. I believe the "recipe" calls for 1 cup of each, or about half a bag. I usually go for the entire bag of both, for a really thick and delicious coating. In the picture below, I skimped and they don't look as nice. Silly "recipe."

STEP 7:
Smooth the chocolate/butterscotch mixture liberally over the scrunched mixture. Refrigerate for a few hours, then cut into pieces. (Note: I find it helpful to cut them before the chocolate sets completely, and then put them back in the fridge to finish after that.) Resist the urge to eat them before guests arrive/you bring them to church picnic/your husband or roommate return home. You can satisfy your cravings by licking your fingers that you used to mix the whole thing. Or by making two batches and hiding one in your secret hiding spot.


STEP 9:
Enjoy! :-)

September 1, 2010

S'more Cupcakes - updated

Last April, I posted a recipe for S'more cupcakes. Here's the link: http://sarahsweettooth.blogspot.com/2010/04/smore-cupcakes.html. I made these again the other day, and took more photos. So while I won't re-post the recipe, I will post these pictures... just for fun. I think the end result was a lot more attractive this time.

Graham cracker base sprinkled with mini chocolate chips.


The cupcake batter, ready to be poured.

Ready to bake!

 
Ready for the icing.


Marshmallow meringue.

 
All done!


August 22, 2010

Flower Pot Minis & Devilishly Delicious Chocolate Cupcakes


Even though it was over 90 degrees in my kitchen the night I made these, and the buttercream frosting melted a bit, I still thought these were fun to make. I bought half a dozen small flower pots at Michael's (also available at any other craft store). Topping the cupcakes with flower petals of frosting, and centering a small pearl frosting, I then placed the mini cupcakes into the flower pots. These are cute, and I'm looking forward to trying it again when my kitchen isn't so stinking hot. (You can also do these with regular cupcakes and larger flower pots). 

Anyway, here's the recipe for the "Devilishly Delicious Chocolate Cupcakes" - courtesy of the wrapper for Nestle Bittersweet Chocolate Melting Bars. Thought I'd share:-)

Ingredients:
4 oz. bittersweet chocolate baking bar, broken into small pieces (62% cacao)
1 cup all-purpose flour
1/4 cup unsweetened cocoa powder
1/2 tsp. baking soda
1/4 tsp. salt
1/2 cup buttermilk
1/4 cup water
1 cup packed light brown sugar
1/2 cup vegetable oil
3 large eggs
1/2 tsp vanilla extract

Preheat oven to 350 degrees. Line 14 muffin cups.

Melt chocolate (either microwave in small, uncovered bowl, or on the stove - place a bowl over a pot of simmering water). Let chocolate cool to room temperature.

Combine flour, cocoa powder, baking soda, and salt in small bowl.

Combine buttermilk and water in small glass bowl.

Beat brown sugar, oil, eggs and vanilla extract in large mixer bowl on high for 2 minutes.

Beat in melted chocolate.

Beat flour mixture into creamed mixture alternately with buttermilk mixture.

Spoon into prepared muffin cups, filling 3/4 full.

Bake for 18-23 minutes or until wooden pick comes out clean. Cool in pan for 10 minutes; remove to wire rack to cool completely before frosting.

These are yummy and chocolaty:-) Enjoy!

August 17, 2010

Stained Glass Heart Cupcakes


These mini cupcakes are decorated with "stained glass hearts," which are actually quite easy to make. The ingredient? Jolly Ranchers! When I first read about this method of making edible stained glass, I was informed that crushing the candies into small pieces would make it easier. I found this to be completely false; it just got messy. So I skipped that step. I put some tinfoil on a baking sheet, and simply lined up Jolly Ranchers of the same color in two rows, about 1/4 inch apart from each other. I put them in the oven at 350 degrees for 3-4 minutes. This melted them down to a bubbling (very hot!) liquid. I let them cool for 1-2 minutes, and then pressed small heart cookie-cutters into the liquid. After waiting another 2-3 minutes, I pressed the cookie cutters into the hardening candy, reprinting the previous imprint. After breaking away the edges, this process creates beautiful "stained glass" shapes (you can do this with any shape/size cookie cutter.) I then placed them on top of the mini cupcakes (recipe to follow soon) and ta-da! Easy but beautiful decorations.

Here's a picture of the hearts cooling:

Another method of making shapes like this - crush up the candies (I'm sure there's a way to do this without making a huge mess - I just have yet to find it), and place them inside cookie cutters. Melt in the oven (at the above-mentioned temp & time). You won't be wasting any candy this way, but you'll need multiple cookie cutters.

Enjoy!

August 10, 2010

Guiness Cookies

 
Guiness Cookies
I found this recipe on another blog, so instead of re-writing it I am just going to post the link. These cookies were dark and rich, with a Guinness bitter flavor afterward. My husband, who is not a fan of Guinness, did not like these cookies at all. Our other friends, who love the beer, thought they were amazing. I agree with them. These are great for that "something different" if you're tired of same-old chocolate chip. The cookies are chewy and full of flavor. They got a lot bigger than I expected, but it might have been the baking sheets I have (sometimes they cause cookies to flatten out more than I expect.) The hardest part of this recipe was reducing the beer - it took a lot longer than the recipe says (maybe I'm just an idiot), but once it finally finished it was exactly 1/3 cup, just what I needed.


Here's the link to the other (better) blog that has the recipe:

I sprinkled mine with a bit of powdered sugar, just for fun.


July 10, 2010

Pink Champagne Cupcakes


I got the idea for this recipe from a Betty Crocker cupcake book, but it calls for a box of cake mix (Betty Crocker, of course), and I prefer to avoid boxed mixes. So I experimented with two different homemade cake recipes (a buttermilk cake and a yellow butter cake). The yellow butter cake won as the better cake to mix with the champagne (the buttermilk cake was a bit too dense). So here's the combo that worked out best:

12 tablespoons unsalted butter, softened
3/4 cup plus 2 tablespoons sugar
3 eggs, beaten
1 teaspoon pure vanilla extract
1 1/3 cups all-purpose flour
3 teaspoons baking powder
3 - 6 tablespoons champagne (okay, I know this seems like a drastic variance, but it depends on how moist the batter is before you add it in, as well as how much of a champagne flavor you want. The alcohol will cook out, but it's still nice to have some of that flavor left when the cupcakes come out of the oven - so just experiment with the amount of champagne and see what happens!) 

Also: you don't need high-quality champagne for this recipe (score!)

Preheat oven to 350 degrees (325 for dark pans).

Cream together butter & sugar until light and creamy. Gradually add the beaten eggs, mixing well between each addition and scraping down the sides of the mixing bowl from time to time. Add the vanilla.

Sift together the flour and baking powder and add to the mixture in two batches. Stir in the champagne. Mix until smooth.

Fill cupcake tins 2/3 full and bake in preheated oven for 12-15 minutes (or until toothpick is inserted and removed clean).

FROSTING:
1/2 cup butter, softened
4 cups powdered sugar
1/4 cup champagne
1 teaspoon vanilla
4-5 drops red food coloring (I use some awesome coloring gels, so a tad of pink works well)

In medium bowl, beat ingredients with electric mixer on medium speed until smooth. Frost cupcakes, and sprinkle with pink sugar and pearl sprinkles.

(You can also add some drops of food coloring to the cupcake batter, but I opted not to).

These cupcakes are awesome. Just be aware that while the champagne cooks out of the cupcakes, but not of the frosting. There is only a minimal amount, so don't worry about "eating and driving" but I would recommend not making these for children.

Also, just another helpful hint: if you like to eat the batter, remember that the champagne is not cooked out of that, either:
 

Please eat responsibly! :-)

July 7, 2010

Black & White Cookies


In my opinion, these cookies are more aesthetically pleasing than they are tasty, but if you like a crispier cookie then you'll like this one. I personally prefer soft cookies, but these, while crispier, have a gooey glaze on top that balances it out well. The dough can be prepared in advance and the cookies baked the day before you plan to decorate them. So here's the recipe! 

COOKIES:
1 1/3 cups all-purpose flour
1/3 cup unsweetened cocoa powder
1/2 teaspoon baking powder
1/2 teaspoon baking soda
a pinch of salt
1 stick unsalted butter, softened
1 cup & 2 tablespoons sugar
1 egg, beaten
1 teaspoon pure vanilla extract

Sift together the flour, cocoa powder, baking powder, baking soda, and salt into a mixing bowl and set aside.

Cream together the butter and sugar until light and creamy in a large bowl.

Add the beaten egg and vanilla and mix well.

Add the sifted dry ingredients and mix again until smooth.

Bring together in a dough and knead very lightly and briefly. Flatten into a disk, wrap in plastic wrap, and refrigerate for a couple of hours until very firm.

Preheat the oven to 350 degrees.

Dust the work surface with flour and roll out the chilled cookie dough into a thickness of about 1/8 inch.

Side note: I have a great wooden rolling pin, but I needed a good cover for it. At Bed, Bath, & Beyond , I bought a Regency Naturals Pastry Cloth & Rolling Pin Cover. I highly recommend this. The pastry cloth and the rolling pin cover absorb most of the flour, so they create a great non-stick surface while allowing the dough to remain light and flaky. Anyway, I highly recommend it. But back to the recipe!

Using 2-inch and 3-inch round cookie cutters, stamp out rounds and place on baking sheets line with parchment. Re-roll scraps and stamp out more circles. If you don't happen to have cookie cutters, use anything circular you can find. I made these just before I invested in some new cookie cutters, so I used a small handmade vase made by my friend Sarah's husband (thanks, Adam & Sarah, for giving away awesome  wedding favors!)


Bake on the middle shelf for 12-15 minutes, or until crisp (my oven is old and the temp is unreliable, so it only took about 8-10 minutes for mine to get crisp).

Let cool on the sheets for a few minutes before transferring to a wire rack to cool completely.
 

CHOCOLATE GLAZE:

9 1/2 ounces bittersweet chocolate, chopped
2 tablespoons sunflower or peanut oil

Put the chocolate and oil in a heatproof bowl set over a pan of simmering water. Stir until smooth and thoroughly combined. Set aside to cool for about 10 minutes before using.

DECORATION CHOCOLATE:

3 1/2 ounce white chocolate, chopped

Put the white chocolate in a heatproof bowl set over a pan of barely simmering water. Stir until smooth and thoroughly melted. 

Put the cookies back on some baking parchment to catch any drips while decorating.

Fill a piping bag (or plastic baggie with a corner snipped off) with the molten white chocolate and get a toothpick ready for "feathering".

Pour some of the chocolate glaze over each cookie with a spoon.

Spread the glaze neatly over the cookie, just to the edge, with the back of the spoon. Repeat with remaining cookies.

Working quickly, pipe dots of white chocolate over the dark chocolate glaze on just a few of the cookies.

Using the point of the toothpick, drag the white chocolate into the chocolate glaze to create a feathered effect. Repeat with the remaining cookies and let set before serving.
 

Enjoy! :-)

July 5, 2010

Double Chocolate Cupcakes w/ Homemade Vanilla Buttercream

Happy Independence Day!


In honor of the 4th of July, I (surprise!) made cupcakes. They are double-chocolate cupcakes, topped with an amazingly simple (& delicious) vanilla buttercream frosting. The cupcakes themselves are densely chocolatey. Here's the recipe:

DOUBLE CHOCOLATE CUPCAKES

3 oz. bittersweet chocolate, chopped
3 tablespoons unsalted butter, softened
3/4 cup packed light brown sugar
2 eggs, beaten
1/2 teaspoon vanilla extract
1 cup & 2 tablespoons all-purpose flour
1 heaping tablespoon cocoa powder
1/2 teaspoon baking powder
1 teaspoon baking soda
pinch of salt
1/2 cup sour cream*
6 tablespoons boiling water

*If you don't have sour cream on hand, then there are many different substitutes you can use. An easy google search list many good options, but I went with a mixture of buttermilk & butter. To equal a 1/2 cup sour cream, I used 3/8 cup buttermilk and 2 and 2/3 tablespoons butter.

Melt the chocolate in a microwave or in a heatproof bowl set over a pan of barely simmering water (stirring constantly). 

Cream together butter and sugar until light and creamy.

Gradually add the beaten eggs, mixing well between each addition and scraping down the sides of the bowl from time to time.

Add the vanilla and melted chocolate and stir well. Sift the flour, cocoa, baking powder & soda, and salt together.

Add the flour mixture in alternate batches with the sour cream. Stir.

Add the boiling water and mix well.

Fill cupcake liners about 2/3 full (if doing mini cupcakes, then about 3/4 full). Bake in a preheated oven at 350 degrees (325 for dark pans) for about 10-15 minutes. (For mini cupcakes, check after 7 minutes).

Let cool in pan for a few minutes before transferring to cooling rack.

FROSTING:
2 sticks unsalted butter, softened
2 cups confectioner's sugar, sifted
a few drops of vanilla (or whatever flavor you choose - this is entirely optional)

Beat butter in bowl until really soft. Gradually add the sifted sugar and beat until pale and smooth. Beat in the vanilla or flavoring, if using.

This frosting is incredibly easy. The original recipe called for 3 sticks of butter and 3 cups of sugar, but I lessened it so I wouldn't have too much excess. That said, I still have an entire bowl full in the fridge, so it would even be possible to take it down to 1 stick of butter and 1 cup confectioner's sugar. And it's really easy to make more, if you run out.

I frosted these cupcakes with a flower tip and these super cool accordion-looking plastic tubes. You put the frosting inside, add the tip of your choice, and then simply press the bottom of the tube down to expel the frosting. These are from Pampered Chef, and make frosting cupcakes incredibly easy! It also makes it look more "gourmet" than the regular smooth frosting.

For the holiday, I topped them off with sugar red-white-and-blue stars. They were a big hit and I highly recommend them.

Enjoy!

June 29, 2010

Mexican Hot Chocolate Frosting


This frosting was originally recommended to go with chocolate cupcakes filled with peanut butter cups (at least on the Food Network website, where I found it).  I didn't have any peanut butter cups, and was running low on chocolate (shocking, I know - don't worry, I'm all stocked back up). So, I made plain old vanilla cupcakes and tossed in some chocolate chips. It was really the frosting I wanted to try - Mexican Hot Chocolate Frosting.  I've always been taken with the idea of chocolate & chili, but haven't had the courage to try it. So when my friend Rachel (who enjoys spicy food and lived in California for a while) came over for dinner the other night, I figured this was the perfect time to try out the frosting. It's not exactly spicy, but it is very flavorful. I think it would be better on rich, chocolate cupcakes instead of vanilla, but it was still good. Just fair warning - this recipe makes a lot. I intended it for 12 cupcakes, and have a bunch left over in the fridge that needs to be used up. Anyway, enough talking, here's the recipe:

1 (8-ounce) package cream cheese, at room temperature
1/2 cup (1 stick) unsalted butter, at room temperature
1 teaspoon chili powder
1/2 teaspoon ground cinnamon
1/4 teaspoon salt
1 teaspoon vanilla extract
3 cups confectioners' sugar, sifted
3 ounces unsweetened chocolate, melted


Using a hand-held mixer, cream the cream cheese and butter together thoroughly. Add chili powder & cinnamon, mix. Add salt, vanilla, & confectioner's sugar; mix. Add melted chocolate and mix until thoroughly blended and smooth. If the mixture needs thickening, add more confectioner's sugar until it reaches a spreadable consistency.

I topped mine off a Cinnamon Imperial just for fun. This is definitely a good twist on the typical chocolate frosting, but if you're a die-hard, strict chocoholic I would recommend sticking with a more traditional recipe. If you're a bit more adventurous, then enjoy!

June 26, 2010

Black Bottom Cupcakes

These are my favorite cupcakes thus far. I was searching for a good recipe to make, when my friend Barb suggested I try Black Bottom Cupcakes. I've only ever had these in a more muffin-like form, and wasn't a big fan. However, these cupcakes were ridiculously awesome. I got many compliments on them, and ate quite a few myself! (Usually I only eat one to see if it tastes okay; I'm more of a batter person). Anyway, this is a mixture of several different recipes from various sources, so here goes -


CUPCAKES
3 cups all-purpose flour
2 cups white sugar + a few teaspoons more, based on preference
1/2 cup unsweetened cocoa powder
1 teaspoon salt
2 teaspoons baking soda
2/3 cup vegetable oil
2 cups water
2 tablespoons vinegar
2 teaspoons vanilla extract

CREAM CHEESE FILLING
1 (8 ounce) package cream cheese, softened
1 egg
1/2 cup white sugar
1/4 teaspoon salt
1 cup semisweet chocolate chips
*Note: this makes a little more filling than necessary for the cupcakes, but it's difficult to split an egg into a smaller portion. Just be prepared to have some left over.

Preheat oven to 350 degrees. Line ~24 cupcake tins with liners.

In a large bowl, mix together dry "cupcake" ingredients. Stir in wet "cupcake" ingredients until blended.

To make the filling, mix together the cream cheese, egg, sugar, and salt with a hand-held mixer until light & fluffy. Stir in chocolate chips.

Fill cupcake tins 1/3 full. Add a dollop (or heaping teaspoon) of the cream cheese mixture on top, fill another 1/3 with batter (the end result should be the batter 2/3 of the way up the cupcake tin, with the cream cheese part either completely covered or almost all the way covered). Bake in preheated oven approximately 15-20 minutes.

CREAM CHEESE FROSTING
(The beauty of these cupcakes is that the cream cheese filling is slightly tangy, contrasting with the sweetness of the cupcake. Because of that, I kept frosting to a bare minimum - I didn't even cover the entire cupcake with it. If you want more frosting, double this recipe).

2 oz. cream cheese, softened
2 tablespoons butter, softened
4 oz. confectioner's sugar
1 1/2 teaspoons to 1 tablespoon milk
1/4 tsp vanilla extract

Combine the cream cheese and butter in a medium bowl. Beat with an electric mixer until light & fluffy. Gradually add the confectioner's sugar and 1 1/2 teaspoons of milk and beat until smooth. Add the vanilla extract, and remaining milk of mixture is too thick.

This produces a very soft frosting, which works well texture-wise for these cupcakes, but will not work well for any piping or frosting decorations you might want to do.

When cupcakes have cooled, ice with a small amount of the cream cheese frosting. Sprinkle with a hint of cinnamon for an extra splash of awesomeness.

Enjoy!

June 5, 2010

Baked Doughnuts

My family visited over Memorial Day weekend, and I thought the perfect pre-church activity Sunday morning would be decorating doughnuts. I received some doughnut pans for my birthday this year, which allows me now to make dozens of baked doughnuts very easily. I just follow the recipe on the back of the pans, and then pipe the batter into the pans using a ziploc bag with a corner snipped off (this reduces the mess, and the batter doesn't get all over the middle part). I have a regular-size pan and a mini-pan, and it took three or four tries to get the minis to actually turn out correctly (I was over-filling the batter cups!) Anyway, they cook in about five minutes, they are delicious, and somewhat healthier for you since they aren't fried. You can top them however you desire - chocolate glaze, vanilla glaze, lemon, cinnamon and sugar, powdered sugar, etc. After trying several different glaze recipes, I decided to take the easy route and microwave some store bought chocolate frosting for my nephews to use. I then gave them free reign to my sprinkle collection (BIG mess, but BIG fun). Here are some pictures of their creations:

 
Erin helps Joel (5) and Nathan (3) with their sprinkle allotment.

 
Joel & Nathan display their final creations (they were devoured shortly thereafter).


Ezra (7) carefully decorates using every type of sprinkle, while fresh-from-the-oven doughnuts cool in the foreground.

 
Ezra shows off his masterpiece.


Isaac (9) was the first to finish his decorating (and the first to eat it!)

 
The remaining doughnuts were dipped in melted butter, then dunked in a cinnamon and sugar mixture - this was the topping of choice for all of the adults present.


This was a fun (but messy) activity, and very easy to orchestrate! (Just be aware of the risk of sprinkle spillage - I'm still sweeping up blue decorating sugar!) The recipe is on the back of the doughnut pans, and varies based on the size of the pan, so I won't post it here - but if you have a sweet tooth like I do, I highly recommend these doughnuts! They are quickly becoming a Sunday morning tradition (although when it's just my husband and myself, we don't go quite as overboard with the sprinkles ;-).