June 29, 2010

Mexican Hot Chocolate Frosting


This frosting was originally recommended to go with chocolate cupcakes filled with peanut butter cups (at least on the Food Network website, where I found it).  I didn't have any peanut butter cups, and was running low on chocolate (shocking, I know - don't worry, I'm all stocked back up). So, I made plain old vanilla cupcakes and tossed in some chocolate chips. It was really the frosting I wanted to try - Mexican Hot Chocolate Frosting.  I've always been taken with the idea of chocolate & chili, but haven't had the courage to try it. So when my friend Rachel (who enjoys spicy food and lived in California for a while) came over for dinner the other night, I figured this was the perfect time to try out the frosting. It's not exactly spicy, but it is very flavorful. I think it would be better on rich, chocolate cupcakes instead of vanilla, but it was still good. Just fair warning - this recipe makes a lot. I intended it for 12 cupcakes, and have a bunch left over in the fridge that needs to be used up. Anyway, enough talking, here's the recipe:

1 (8-ounce) package cream cheese, at room temperature
1/2 cup (1 stick) unsalted butter, at room temperature
1 teaspoon chili powder
1/2 teaspoon ground cinnamon
1/4 teaspoon salt
1 teaspoon vanilla extract
3 cups confectioners' sugar, sifted
3 ounces unsweetened chocolate, melted


Using a hand-held mixer, cream the cream cheese and butter together thoroughly. Add chili powder & cinnamon, mix. Add salt, vanilla, & confectioner's sugar; mix. Add melted chocolate and mix until thoroughly blended and smooth. If the mixture needs thickening, add more confectioner's sugar until it reaches a spreadable consistency.

I topped mine off a Cinnamon Imperial just for fun. This is definitely a good twist on the typical chocolate frosting, but if you're a die-hard, strict chocoholic I would recommend sticking with a more traditional recipe. If you're a bit more adventurous, then enjoy!

June 26, 2010

Black Bottom Cupcakes

These are my favorite cupcakes thus far. I was searching for a good recipe to make, when my friend Barb suggested I try Black Bottom Cupcakes. I've only ever had these in a more muffin-like form, and wasn't a big fan. However, these cupcakes were ridiculously awesome. I got many compliments on them, and ate quite a few myself! (Usually I only eat one to see if it tastes okay; I'm more of a batter person). Anyway, this is a mixture of several different recipes from various sources, so here goes -


CUPCAKES
3 cups all-purpose flour
2 cups white sugar + a few teaspoons more, based on preference
1/2 cup unsweetened cocoa powder
1 teaspoon salt
2 teaspoons baking soda
2/3 cup vegetable oil
2 cups water
2 tablespoons vinegar
2 teaspoons vanilla extract

CREAM CHEESE FILLING
1 (8 ounce) package cream cheese, softened
1 egg
1/2 cup white sugar
1/4 teaspoon salt
1 cup semisweet chocolate chips
*Note: this makes a little more filling than necessary for the cupcakes, but it's difficult to split an egg into a smaller portion. Just be prepared to have some left over.

Preheat oven to 350 degrees. Line ~24 cupcake tins with liners.

In a large bowl, mix together dry "cupcake" ingredients. Stir in wet "cupcake" ingredients until blended.

To make the filling, mix together the cream cheese, egg, sugar, and salt with a hand-held mixer until light & fluffy. Stir in chocolate chips.

Fill cupcake tins 1/3 full. Add a dollop (or heaping teaspoon) of the cream cheese mixture on top, fill another 1/3 with batter (the end result should be the batter 2/3 of the way up the cupcake tin, with the cream cheese part either completely covered or almost all the way covered). Bake in preheated oven approximately 15-20 minutes.

CREAM CHEESE FROSTING
(The beauty of these cupcakes is that the cream cheese filling is slightly tangy, contrasting with the sweetness of the cupcake. Because of that, I kept frosting to a bare minimum - I didn't even cover the entire cupcake with it. If you want more frosting, double this recipe).

2 oz. cream cheese, softened
2 tablespoons butter, softened
4 oz. confectioner's sugar
1 1/2 teaspoons to 1 tablespoon milk
1/4 tsp vanilla extract

Combine the cream cheese and butter in a medium bowl. Beat with an electric mixer until light & fluffy. Gradually add the confectioner's sugar and 1 1/2 teaspoons of milk and beat until smooth. Add the vanilla extract, and remaining milk of mixture is too thick.

This produces a very soft frosting, which works well texture-wise for these cupcakes, but will not work well for any piping or frosting decorations you might want to do.

When cupcakes have cooled, ice with a small amount of the cream cheese frosting. Sprinkle with a hint of cinnamon for an extra splash of awesomeness.

Enjoy!

June 5, 2010

Baked Doughnuts

My family visited over Memorial Day weekend, and I thought the perfect pre-church activity Sunday morning would be decorating doughnuts. I received some doughnut pans for my birthday this year, which allows me now to make dozens of baked doughnuts very easily. I just follow the recipe on the back of the pans, and then pipe the batter into the pans using a ziploc bag with a corner snipped off (this reduces the mess, and the batter doesn't get all over the middle part). I have a regular-size pan and a mini-pan, and it took three or four tries to get the minis to actually turn out correctly (I was over-filling the batter cups!) Anyway, they cook in about five minutes, they are delicious, and somewhat healthier for you since they aren't fried. You can top them however you desire - chocolate glaze, vanilla glaze, lemon, cinnamon and sugar, powdered sugar, etc. After trying several different glaze recipes, I decided to take the easy route and microwave some store bought chocolate frosting for my nephews to use. I then gave them free reign to my sprinkle collection (BIG mess, but BIG fun). Here are some pictures of their creations:

 
Erin helps Joel (5) and Nathan (3) with their sprinkle allotment.

 
Joel & Nathan display their final creations (they were devoured shortly thereafter).


Ezra (7) carefully decorates using every type of sprinkle, while fresh-from-the-oven doughnuts cool in the foreground.

 
Ezra shows off his masterpiece.


Isaac (9) was the first to finish his decorating (and the first to eat it!)

 
The remaining doughnuts were dipped in melted butter, then dunked in a cinnamon and sugar mixture - this was the topping of choice for all of the adults present.


This was a fun (but messy) activity, and very easy to orchestrate! (Just be aware of the risk of sprinkle spillage - I'm still sweeping up blue decorating sugar!) The recipe is on the back of the doughnut pans, and varies based on the size of the pan, so I won't post it here - but if you have a sweet tooth like I do, I highly recommend these doughnuts! They are quickly becoming a Sunday morning tradition (although when it's just my husband and myself, we don't go quite as overboard with the sprinkles ;-).

May 26, 2010

Oreo Balls


Alright, I'll admit - the name is not very glamorous. Nor are these, in fact, cupcakes. However, they have become a house favorite ever since my mother-in-law tasted them at an office party almost two years ago, and we attempted to make them for a New Year's party. They are relatively simple, and absolutely delicious! This recipe makes a lot of them, but they'll be gone before you know it, guaranteed!

1 package Oreos (or generics; don't use double-stuffed though!)
1 8-oz package of cream cheese, softened
Melting/coating/dipping chocolate

Crush the cookies into indiscernible bits. If you have a food processor, this is easy. However, if you don't, there are many creative ways to crush up the cookies. Here a few pictures of my nephews helping me last year with their various creative methods:

Isaac went for the foot-stomping method (don't worry; they're double-bagged!) while Nathan watches, confused.


Ezra decided to crush them with the corner of a lid. He eventually just placed the entire lid on top and jumped up and down on them.


And sweet Joel, after discovering that his hands didn't crush well enough, decided to use a broom. Only, he used the wrong part and just ended up "sweeping" the bag of cookies instead of crushing them.

(Warning: when crushing cookies in ziplocs, especially with children, always double-bag, and let as much air out as possible or you will have a cookie explosion!)

Now, thanks to my KitchenAid food processor, the cookie-crushing process goes much faster, but is slightly less entertaining.

Anyway, crush up almost the entire bag of cookies (save a few out for eating - about five or six - because Oreos rock).

Soften the package of cream cheese, and then mix the crushed cookies and the cream cheese together very well. Form into 1-2 inch balls, put on wax paper, and refrigerate for about an hour.

Using a variety of melting chocolate, dip each ball into the melted chocolate and set on wax paper to cool. I usually use dark chocolate, but this week I also added milk chocolate and white chocolate to the mix. Refrigerate until ready to serve (best when served cool, although can be enjoyed without cooling!)

The chocolate dipping part can get kind of messy, and if you're doing it in a warm kitchen, your cookie balls will start to soften before you dip them. In these situations, I recommend getting out a few at a time, and letting the rest stay in the fridge until you're ready for them.

Once the chocolate has hardened, they are ready to eat! Enjoy!


Just be careful about getting cookie all over your face;-)


May 16, 2010

Butterfly Garden Cupcakes

This week, my husband came home with two new cupcake books for me to explore. One, "What's New, Cupcake?" is the follow-up to a book my mom got me, "Hello, Cupcake." These books show fun ways to decorate cupcakes for all sorts of occasions - baby showers, birthdays, holidays, pranks, etc. While they contain a few basic recipes, they're mainly full of edible decorative schemes. I realized, upon receiving the follow-up book, that I haven't made a lot of the designs form the first book. I found this awesome cookie dough cupcake recipe (to be posted soon), and decided to top these new cupcakes with a butterfly design found in "Hello, Cupcake." This turned out to be quite the endeavor. 

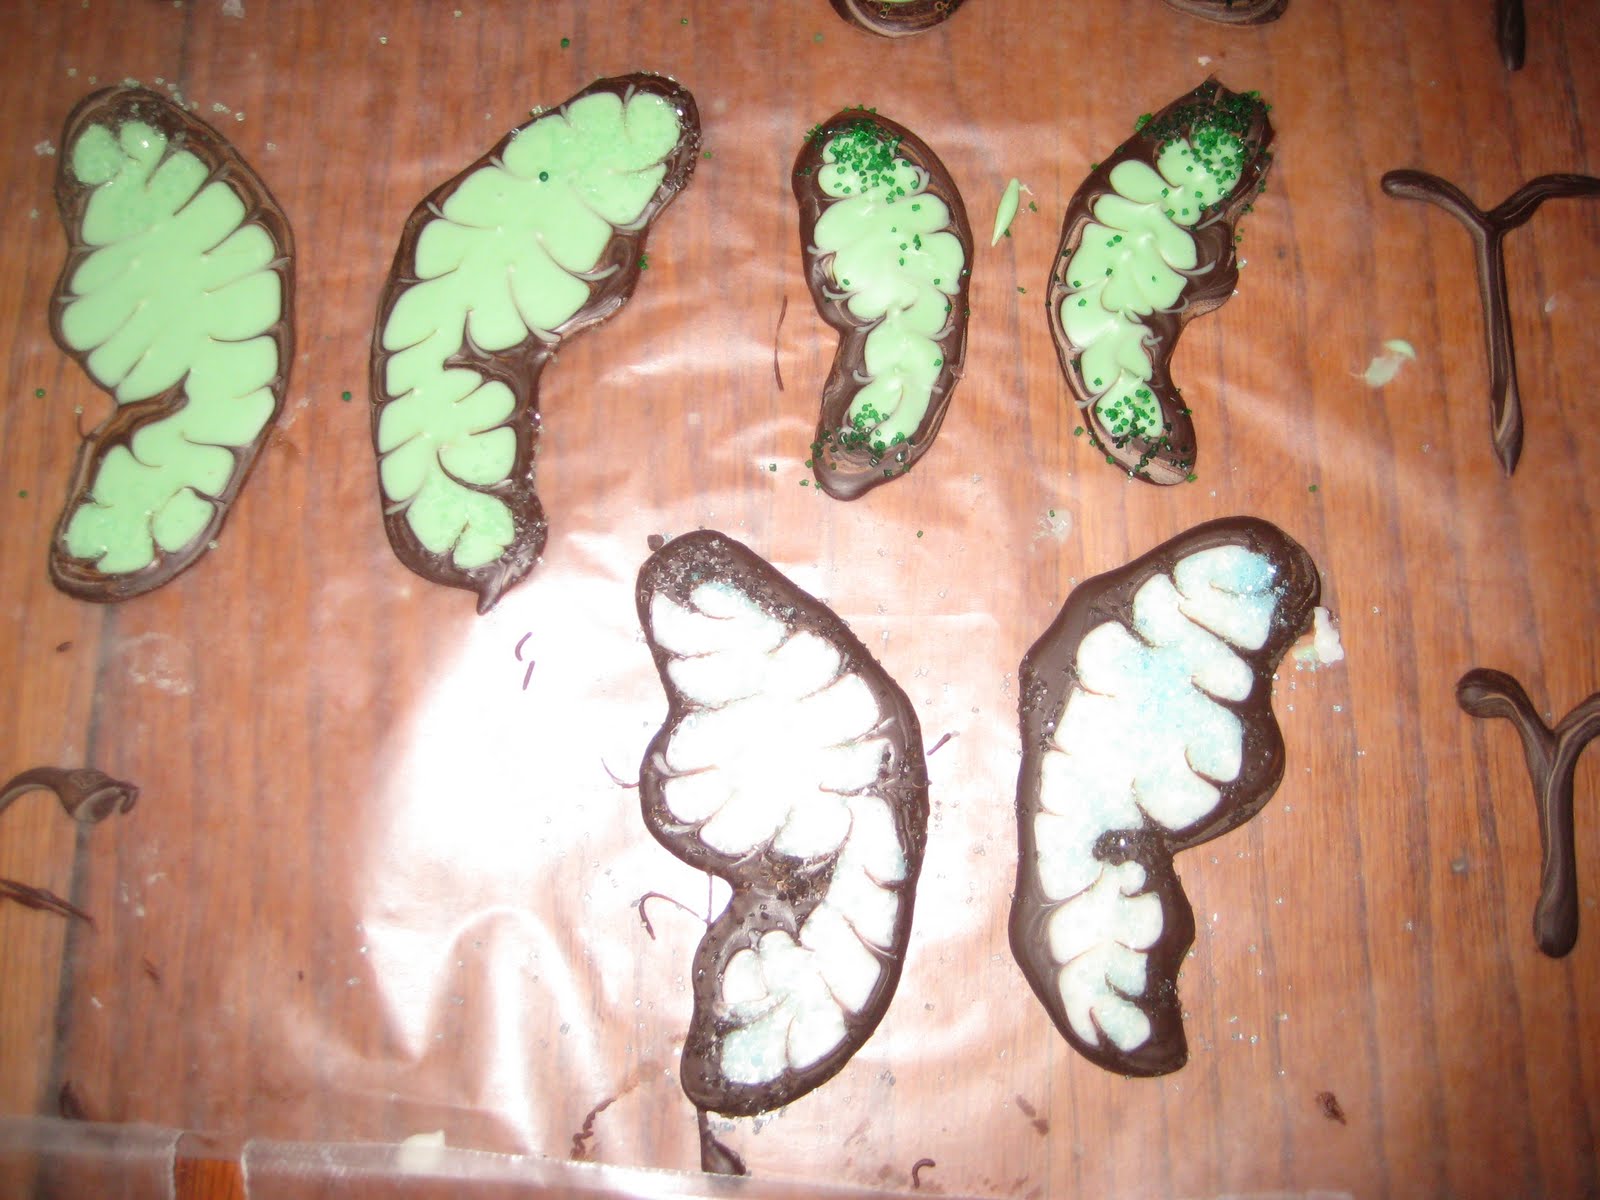
First, I had to make the wings of the butterfly. This involved lots of melting chocolate. Using an outline from the book, I piped the outline of the wings in dark chocolate melting wafers (which apparently work better than regular/"real" dark chocolate because it hardens faster and maintains its consistency pretty well when melted). Then, I filled in the wings with the color of my choice. The book recommended orange, so the butterflies would look like monarchs, but all I had was white and green. Once the outline was filled in (a technique I learned is called "flooding"), I took a toothpick and gently tried to bring some of the dark chocolate into the center to create the wing look. This took some practice - especially learning how long I had before the outline began to set. The first few looked a little "chunky" in the middle, because the melted chocolate had already started to harden by the time I started mixing. And while the wings are still melted and just beginning to set, I sprinkled some colored sugar and nonpareils on the tips for added effect (again, in the book, these are white to assist with the monarch look, but I just went with what I had). I then piped some chocolate antenna.


Once the cupcakes were cool, I frosted them in several colors (vanilla frosting tinted with my coloring gels), and then attempted to apply the wings. Placing a chocolate chip about 1/4 inch apart on the top, I propped the wings against the chocolate chips and piped a chocolate frosting body down the center. I didn't have much luck with the antenna turning out well, so a few of the butterflies have the antenna and most don't. Also, some of the wings oozed together during the cooling process, so for those the "complete" butterfly is just lying flat on top of the cupcake, instead of with its wings pointed up.
But most of them are flapping. Of course, there was the occasional casualty:

But in the end, most of the cupcakes turned out... well, if not perfect, then at least passable. 


I learned, in the end, that the thick chocolate fudgy frosting does a much better job at holding the wings in an upright position - but since I didn't discover this until the last four or five cupcakes, I guess I'll just have to keep my fingers crossed to see if they all survive the ride to work in the morning!

("Hello, Cupcake" is written by Karen Tack & Alan Richardson, and published by Houghton Mifflin. It, as well as "What's New, Cupcake" contain many playful ideas that are supposed to be "easy," but it would appear that my patience level and/or skill level are rather sub-par. I'm hoping to overcome that soon!)

May 2, 2010

Snickers Cupcakes

Pictured above are my attempts at making "peanut cupcakes with nougat-chocolate frosting" - basically, cupcakes that are supposed to taste like Snickers. Again using a recipe from the Food Network magazine, this was a messy and time-consuming recipe, but hopefully worth it!

CUPCAKES:
2 1/2 cups all-purpose flour
2 1/4 teaspoons baking powder
1/2 teaspoon salt
3 large eggs, room temp
3/4 cup granulated sugar
1/2 cup packed light brown sugar
10 tablespoons unsalted butter, melted
1 tablespoon vanilla extract
3/4 cups whole milk
2 cups chopped salted roasted peanuts, plus more for garnish

NOUGAT FROSTING:
2-13 ounce jars marshmallow creme (about 4 cups)
1/2 cup creamy peanut butter
pinch of salt

CHOCOLATE FROSTING:
6 ounces milk chocolate, chopped
4 ounces semisweet chocolate, chopped
2 1/2 cups confectioner's sugar
1/4 cup whole milk
1 stick unsalted butter, softened
1 tablespoon vanilla extract
1/2 teaspoon salt

CUPCAKES:
1) Preheat oven to 350 degrees. Line 24 cupcake tins with paper liners.
2) Whisk flour, baking powder, and salt in a medium bowl.
3) In another bowl, beat eggs and both sugars with a mixer until light and fluffy, about 2 minutes.
4) Gradually beat in the melted butter and vanilla.
5) With mixer on low speed, add half of the flour mixture, the milk, and then the remaining flour.
6) Fold in peanuts but don't overmix.
7) Divide batter evenly among prepared cups, filling each about halfway. Bake about 20-22 minutes, until a toothpick is inserted and comes out clean. Let cool in pans 10 minutes, then transfer to racks to cool completely.

NOUGAT:
1) Beat the marshmallow creme, peanut butter, and salt with a mixer until smooth. Set aside.

CHOCOLATE FROSTING:
1) Put both chocolates in a large microwave safe bowl and microwave on 50 percent power until soft, about  minute. Stir, then continue to microwave until melted, 1-2 more minutes.
2) Add the confectioner's sugar, milk, butter, vanilla and salt and beat with a mixer until smooth and creamy.

Spread nougat frosting over each cupcakes, then top with chocolate frosting, leaving some of the nougat exposed. Garnish with peanuts.

Just a word of caution - once on the cupcake, the nougat spreads out and takes over everything. Trust me, I made a nice big mess! Use a little less nougat topping than you think you should, because no matter how sturdy it looks in the bowl, once it's on the cupcakes it's going to spread out like The Blob. Well, a very tasty Blob. :-) Happy eating!

April 24, 2010

York Peppermint Patty Cupcakes

A few months ago, Food Network magazine published some recipes for cupcakes that were supposed to taste exactly like your favorite candy bar. Today, I tried out the Mint Patty Cakes, which are supposed to taste just like York Patties. Here's the recipe:

CUPCAKES:
3 sticks unsalted butter, cut into pieces
1 cup Dutch-process cocoa powder
3 1/4 cups packed dark brown sugar
3 cups all-purpose flour
1 teaspoon baking powder
1/2 teaspoon baking soda
3/4 teaspoon salt
1 1/4 cups buttermilk
2 large eggs, at room temp
2 teaspoons vanilla extract

TOPPING:
1 pound confectioner's sugar (about 4 cups)
1/2 cup light corn syrup
1/4 cup vegetable shortening or cocoa butter, softened
2 teaspoons peppermint extract

GLAZE:
8 ounces bittersweet chocolate, finely chopped
1/4 cup light corn syrup
1 1/2 tablespoons unsalted butter

CUPCAKES:
1) Preheat oven to 350 degrees & line 2-12 cup muffin tins with paper liners.
2) Put the butter, cocoa powder, and 3/4 cup water in a medium microwave safe bowl, cover with plastic wrap and microwave until the butter melts (about 2 minutes). Whisk to combine, then whisk in the brown sugar.
3) Whisk the flour, baking powder, baking soda and salt in a large bowl. Whisk in the warm cocoa mixture.
4) In another bowl, whisk the buttermilk, eggs and vanilla; stir into the batter until just combined (don't overmix).
5) Divide the batter into the prepared cups, filling each about 3/4 full. Baking about 30-35 minutes, until cupcakes spring back when touches. Let cool in the pan about 10 minutes, then cool completely on a rack.

TOPPING:
1) Beat the confectioner's sugar, corn syrup, shortening and peppermint extract with a mixer until the tight paste forms.
2) Gather into a ball, place between two sheets of parchment paper and roll out to 1/4 inch thick (microwave 15 seconds to soften, if necessary).
3) Use a 2-1/2 inch round cutter or juice glass to cut into disks; reroll scraps. Place a peppermint disk on top of each cupcake.

GLAZE:
1) Put the chocolate, corn syrup, butter, and 1/4 cup water in a microwave safe bowl, cover with plastic wrap and microwave on 50 percent power until the chocolate melts, about 2 minutes.
2) Whisk to combine, then cool slightly.

Spread the glaze over the peppermint topping, leaving some peppermint exposed. Refrigerate until set, about 20 minutes. Serve cold.

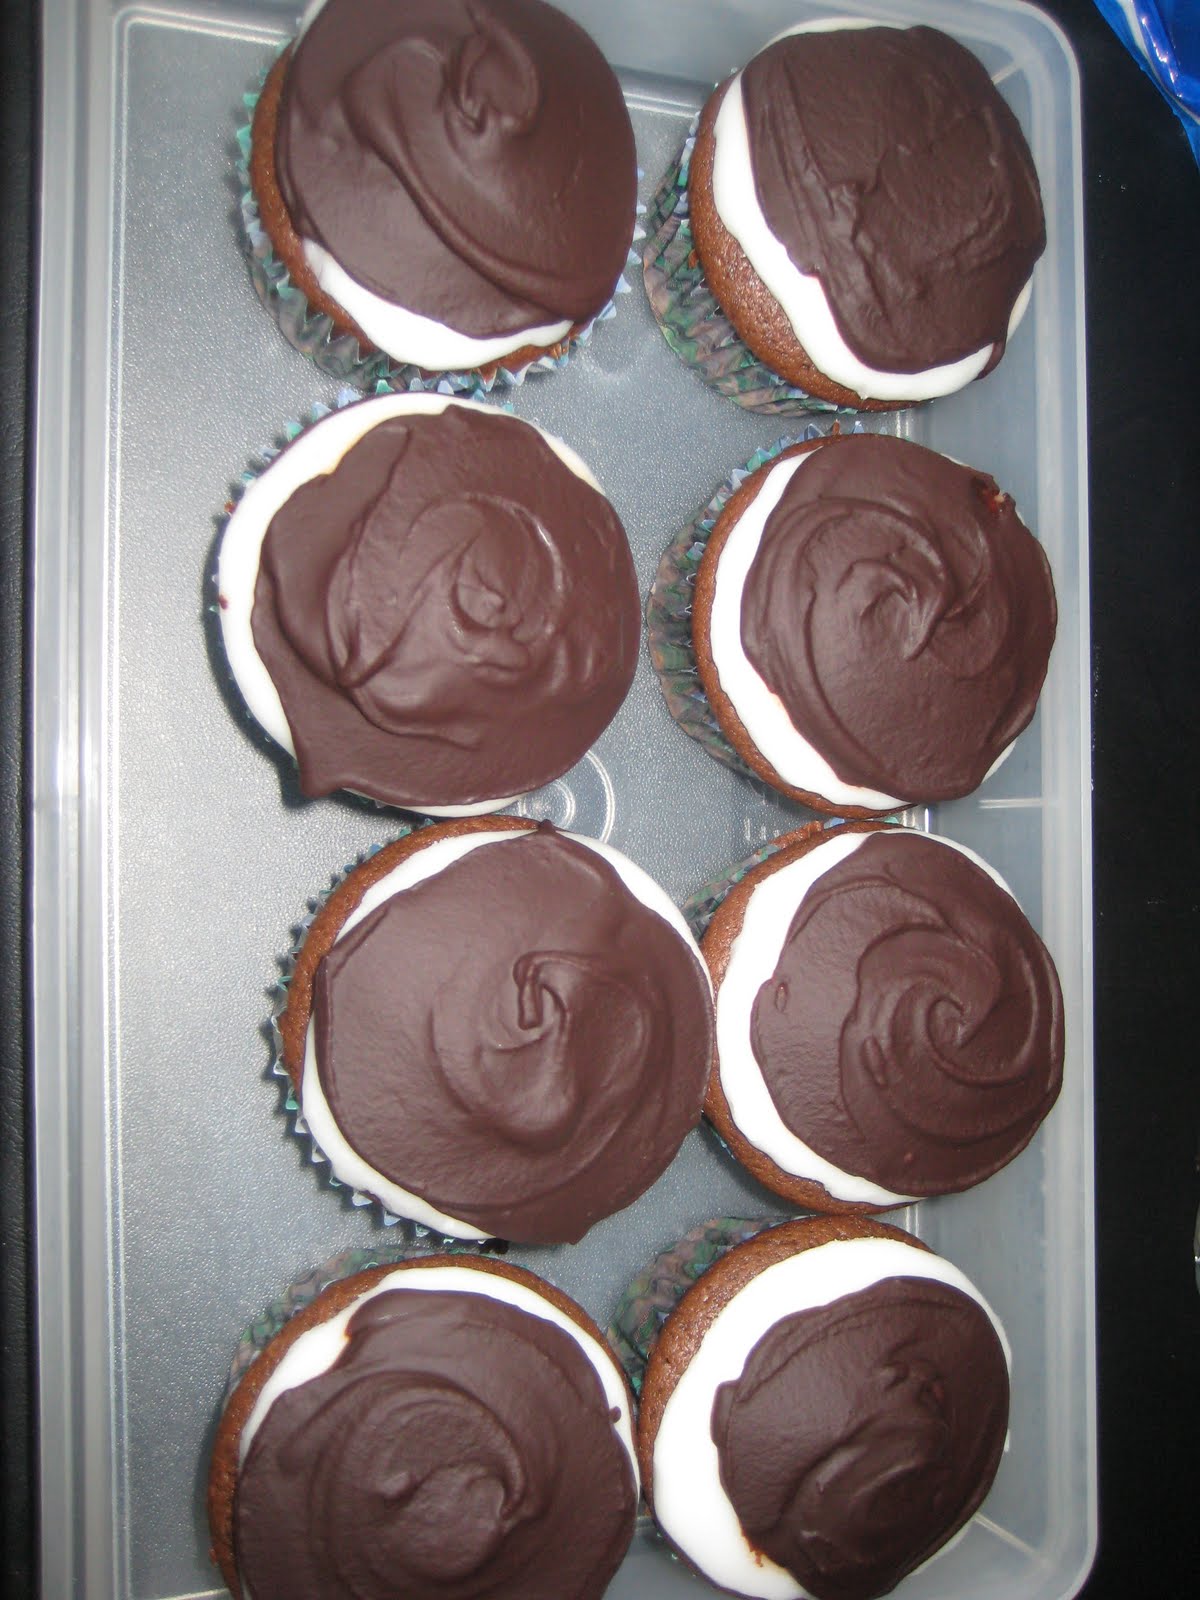
Here are some pictures from my first attempt at these cupcakes: